DOVE SIAMO
Car Wraps Online For Sale
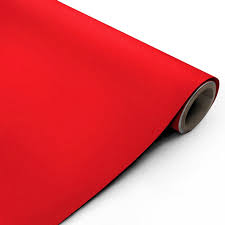
Applying a Red Vinyl Wrap to your car or any other surface can dramatically enhance its appearance, offering a sleek, bold, and polished look. However, achieving a flawless finish requires proper preparation, technique, and attention to detail. Here are some essential tips to help you wrap like a pro:
1. "Prepare the Surface"
Before you begin, ensure the surface is clean and smooth. Wash the area thoroughly to remove dirt, grease, and debris. Use isopropyl alcohol to eliminate any remaining contaminants, as even the smallest particles can cause bubbles or imperfections in the wrap. If the surface has scratches or dents, consider repairing them beforehand for a seamless application.
2. "Gather the Right Tools"
Having the right tools is crucial for an efficient and precise vinyl wrap application. Essential items include:
- A heat gun or hairdryer for flexibility.
- A squeegee or felt-edged applicator to smooth out the wrap.
- A sharp utility knife for trimming.
- Masking tape to outline edges.
- Gloves to avoid fingerprints.
3. "Plan and Measure"
Measure the area you’re wrapping carefully and cut the vinyl wrap slightly larger than needed. This extra material will allow you to adjust and trim for a perfect fit. Planning your approach in sections—starting with flat surfaces and gradually working on curves—will help you avoid mistakes.
4. "Work Slowly"
Patience is key when applying vinyl wrap. Start by peeling back a small portion of the backing paper and adhere the vinyl to the surface. Use your squeegee to press the material down evenly, working from the center outward to prevent air bubbles. Avoid rushing, as this can lead to creases or misalignment.
5. "Use Heat Strategically"
A heat gun is your best friend when dealing with curves, edges, or corners. Gently heat the vinyl to make it more pliable, allowing it to conform smoothly to irregular surfaces. Be cautious not to overheat, as this can damage the material.
6. "Trim with Precision"
Once the vinyl is applied, carefully trim the excess material using a sharp utility knife. Follow the edges of the surface for clean lines. Take your time during this step to avoid cutting too much or damaging the underlying surface.
7. "Seal and Inspect"
After application, use heat to seal the edges of the wrap securely. This step prevents peeling over time. Inspect your work for any bubbles or imperfections and use a pin to release trapped air if necessary.
8. "Practice Makes Perfect"
If you’re new to vinyl wrapping, practice on smaller objects or less visible areas before tackling larger projects like a car hood or door panels. Building confidence and refining your technique will lead to better results.Gloss Metallic Vinyl Wrap
By following these tips, you can achieve a professional-looking finish with red vinyl wrap that turns heads and lasts for years. With patience and practice, your wrapping skills will continue to improve, making every project a success!